.png)
Everything You Need to Know About the Stampin' Hot Foil System
- Nancy & Kayla

- 2 hours ago
- 9 min read
Okay, let's talk about foil. If you've ever scrolled past a handmade card with that mirror-shiny, "wait, how did they DO that?" metallic detail and felt a little pang of craft-supply jealousy... this one's for you. That effect is called hot foiling, and Stampin' Up! just released their very own version: the Stampin' Hot Foil System. It's shiny, it's fun, and it's honestly a little addicting once you get the hang of it.
Below is everything we wish someone had told me before we started — how it works, what you actually need, how to avoid the most common "why isn't this working" moments, and some honest thoughts on whether now's the right time for you to add it to your craft space.
So What Even Is Hot Foiling?

Hot foiling uses heat and pressure to transfer a thin layer of metallic (or colored) foil onto cardstock, giving you a shiny, polished finish — the kind of thing you'd expect to see on a fancy wedding invite, not something you made at your kitchen table. Except... you did make it at your kitchen table. That's the magic part.
A couple quick distinctions, because these get mixed up a lot:
Hot foiling vs. heat embossing — both give you that "wow" factor, but heat embossing leaves a slightly raised, glossy finish (powder + ink + heat tool), while hot foiling gives you a smooth, flat, mirror-like shine because you're transferring actual foil.
Hot foiling vs. regular/adhesive foiling — regular foiling is adhesive-based (think glue, toner, or a laminator to bond the foil). Hot foiling skips all of that — it uses heat-reactive foil and specially made dies to transfer the foil directly. Nothing extra needed in between.
Meet the Stampin' Hot Foil System
Here's the rundown on the actual machine:
Stampin' Hot Foil System & Craft Class — $160
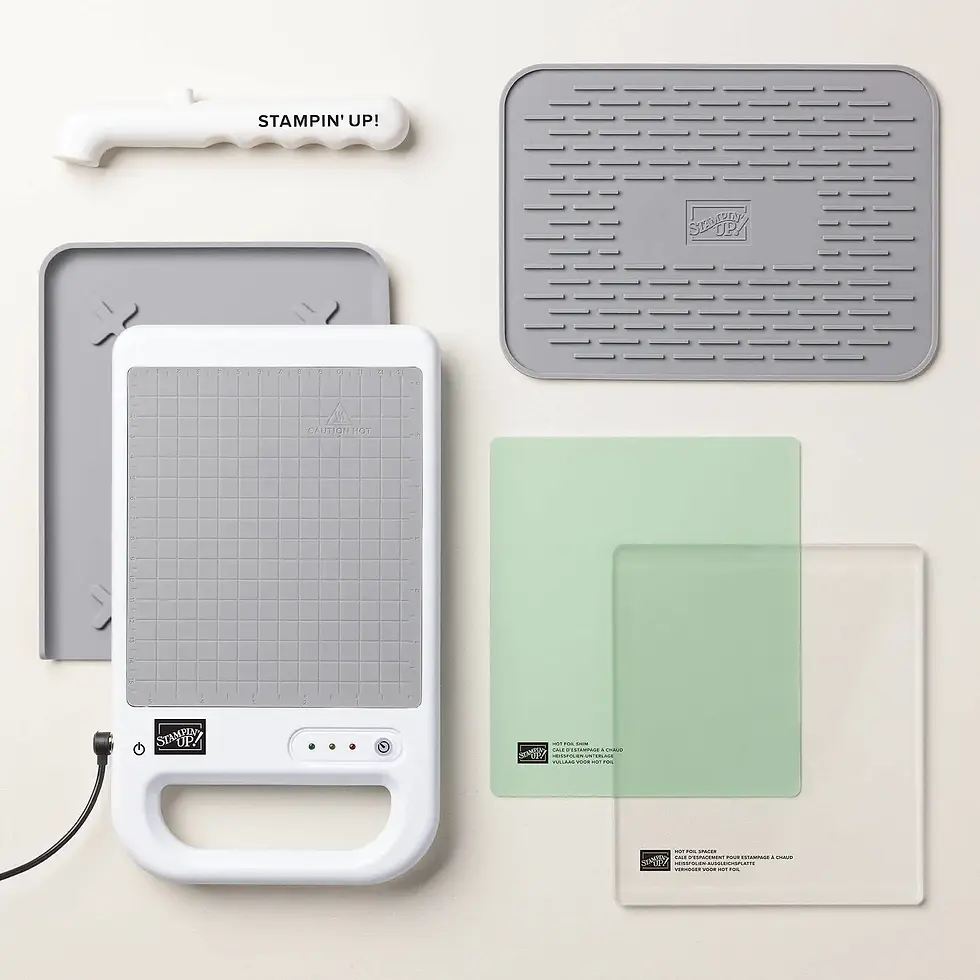
Here's what comes in the box:
Stampin' Hot Foil platform (the heating unit itself)
Silicone platform station
Stampin' Hot Foil Shim & Spacer
Silicone cooling pad
Stampin' Hot Foil Magnetic Pick-Up Tool
Power cord
Access to the Metallic Magic Craft Class (a technique-focused class to help you get the most out of the system)
A few nice touches worth mentioning: the platform has a 5-3/4" x 6-1/2" heating surface, and it's built with some genuinely smart safety features — automatic shutoff and a magnetic power cord, so if it gets tugged it just pops loose instead of yanking the whole thing off your table. It's also refreshingly compact — no giant footprint eating up your craft room.
One important thing: the system doesn't work on its own. You'll also need:
A Stampin' Cut & Emboss Machine (sold separately) — this is what actually runs the heated platform through and applies the pressure
Stampin' Hot Foil Rolls (the foil itself)
Stampin' Hot Foil dies (more on why these are different from your regular cutting dies below)
Heads up: pricing, SKUs, and what's included can change over time, so double-check current details before you order.
Psst... There's a Free Class Included (For a Limited Time)
Here's a genuinely nice perk: if you purchase the Stampin' Hot Foil System, you currently get free access to the Metallic Magic Craft Class — a $30 value — thrown in at no extra cost.
This isn't just a "here's your receipt, good luck" bonus. It's a real, technique-centric virtual class where you'll make unique foiled projects and pick up creative tips designed to help you get more out of the system than you would just winging it on your own. After checkout, you'll get an email with a link to the private group where the class streams, and it's available on-demand after that, so you're not locked into watching at a specific time.
A couple of things worth knowing:
This offer is time-limited, so if it's something that would help you, don't sit on it too long — check the current promotion details before you buy, since offers like this tend to have a real cutoff date.
The class is also sold separately if you already own a hot foil system and just want the technique tips without buying new hardware.
So if you are purchasing the system, DO NOT add this class to your cart. It will automatically be included in your purchase.
If you're brand new to foiling, this is honestly a great reason to buy sooner rather than later — a guided class can flatten a lot of that initial learning curve compared to figuring it all out through trial and error (and trial and error, in this case, means burning through foil while you experiment).
As with all limited-time offers, availability and deadlines can change — check your account or the current product listing for the exact terms before you buy.
How It Actually Works (It's Only 4 Steps!)

Here's the whole process, start to finish:
Plug in the platform and warm your die. (Caution: hot!) Give it the full recommended warm-up time — don't rush this part.
Build your foiling "sandwich." This is your cardstock, foil (shiny side up against the die), and the heated die layered together in the right order.
Unplug it and roll it through your Cut & Emboss Machine. Slow and steady wins here — go at an even pace, don't rush, and only run it through once.
Peel, reveal, and admire your metallic masterpiece. Let it cool fully before you peel — trust me, patience pays off here.
That's genuinely it. It sounds fussy written out, but once you've done it a couple times it becomes pretty second nature.
Plus, you can check out this specially recorded video for m ore tips and directions on how to use the system!
What Materials Work Best?
This is the single biggest factor in how your foiling turns out, so pay attention here. Hot foiling works best on smooth, non-textured surfaces. Specifically:
Two-Tone Cardstock
Smooth cardstock (Basic White Cardstock is a great go-to)
Stampin' Up! vellum
Designer Series Paper
Window Sheets
Pearlized Specialty Paper
Porous or textured papers will give you inconsistent, patchy results — the foil just can't make full, even contact with a bumpy surface. Always test on a small scrap first, especially with a paper you haven't foiled before.
Can I Die Cut After Foiling?
Yes! In fact, foiling first and then die cutting the shape out with a coordinating die is a really popular combo — you get a perfectly shaped, fully-foiled piece ready to pop onto your project.
But here's an important rule: cutting dies and hot foil dies are NOT interchangeable. They're built differently — hot foil dies have deeper-etched, flat designs made specifically for heat transfer, while cutting dies are made to, well, cut. Using a cutting die for foiling (or vice versa) can damage both the die and the system, so keep them in their own separate lanes.
Combining Foiling With Other Techniques
Once you've got the basics down, foiling plays really nicely with other techniques:
Foil first, then stamp. If you're using water-based ink, you can actually wipe off any ink that lands on the foil with a dry tissue or paper towel.
Stamp first, then foil. This helps prevent smearing, though it can be trickier to get your foil placement exactly right.
Foil first, then add color with masks. Line up decorative masks over your foiled image and add color around it for extra dimension — some bundles even come with coordinating masks built in for exactly this purpose.
Project Ideas to Get You Started
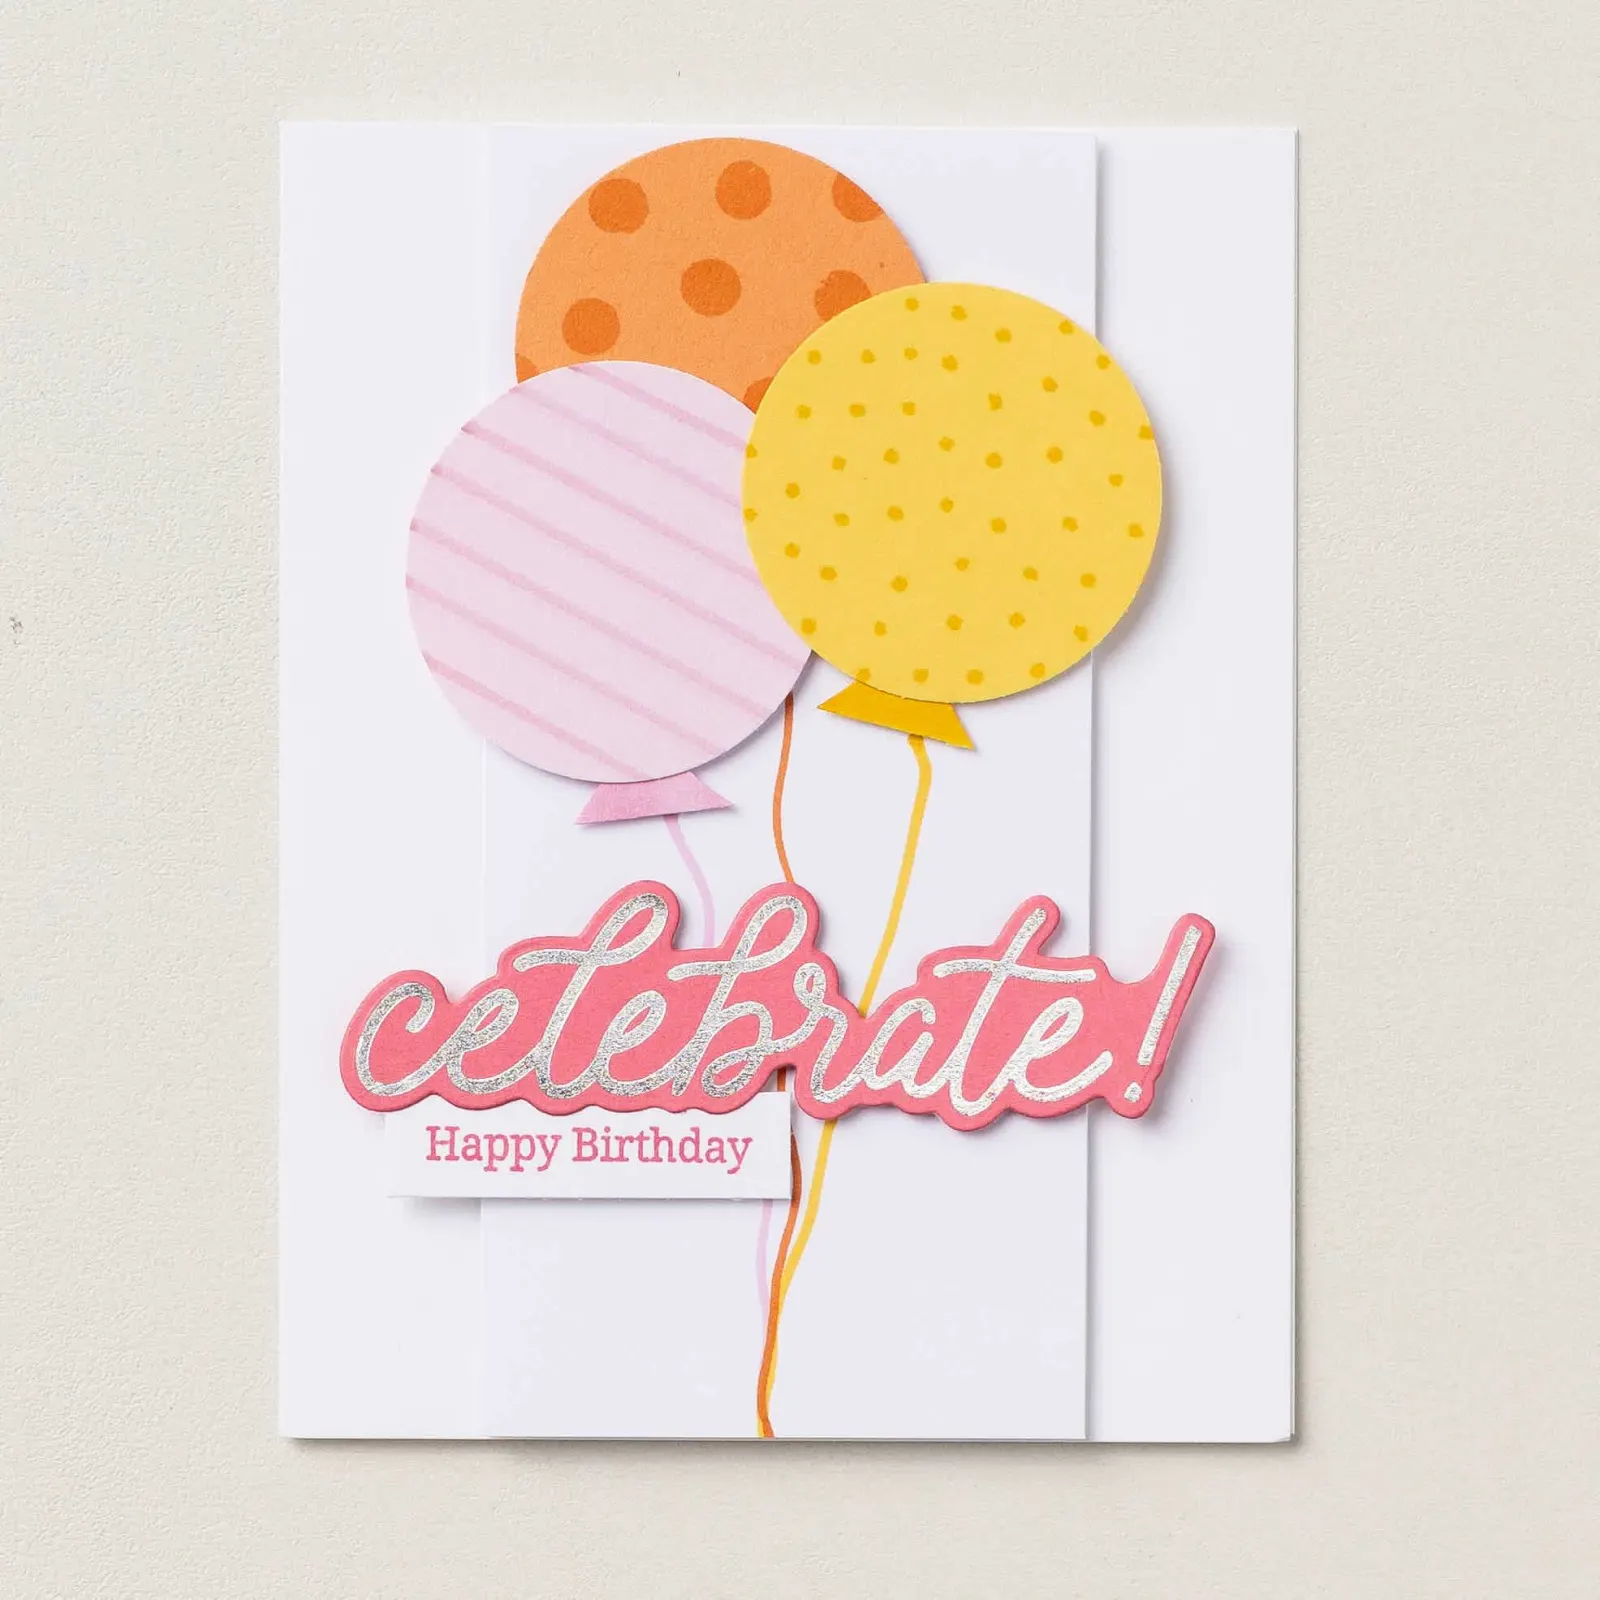
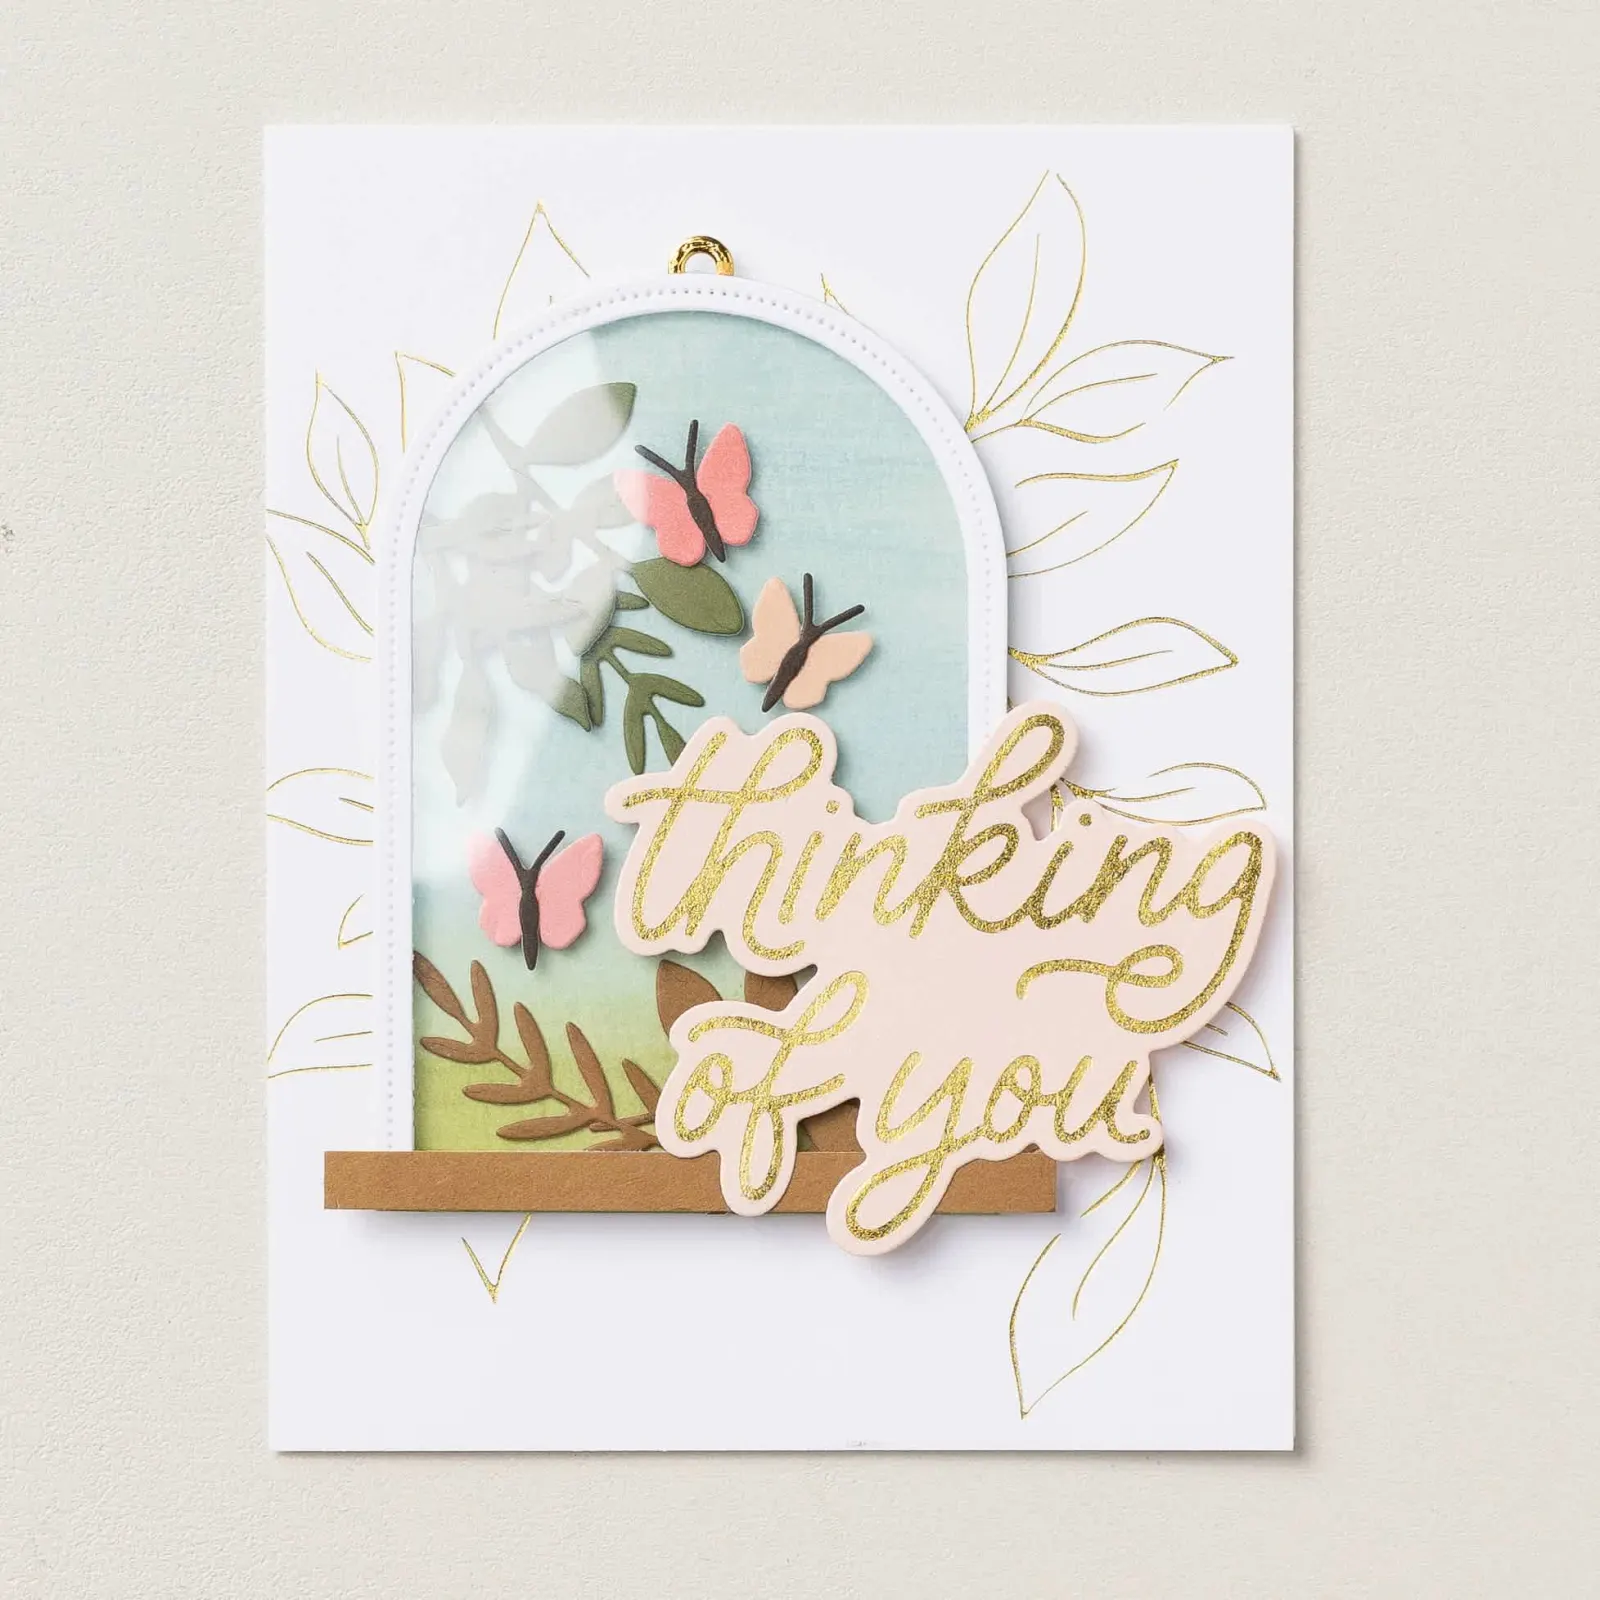
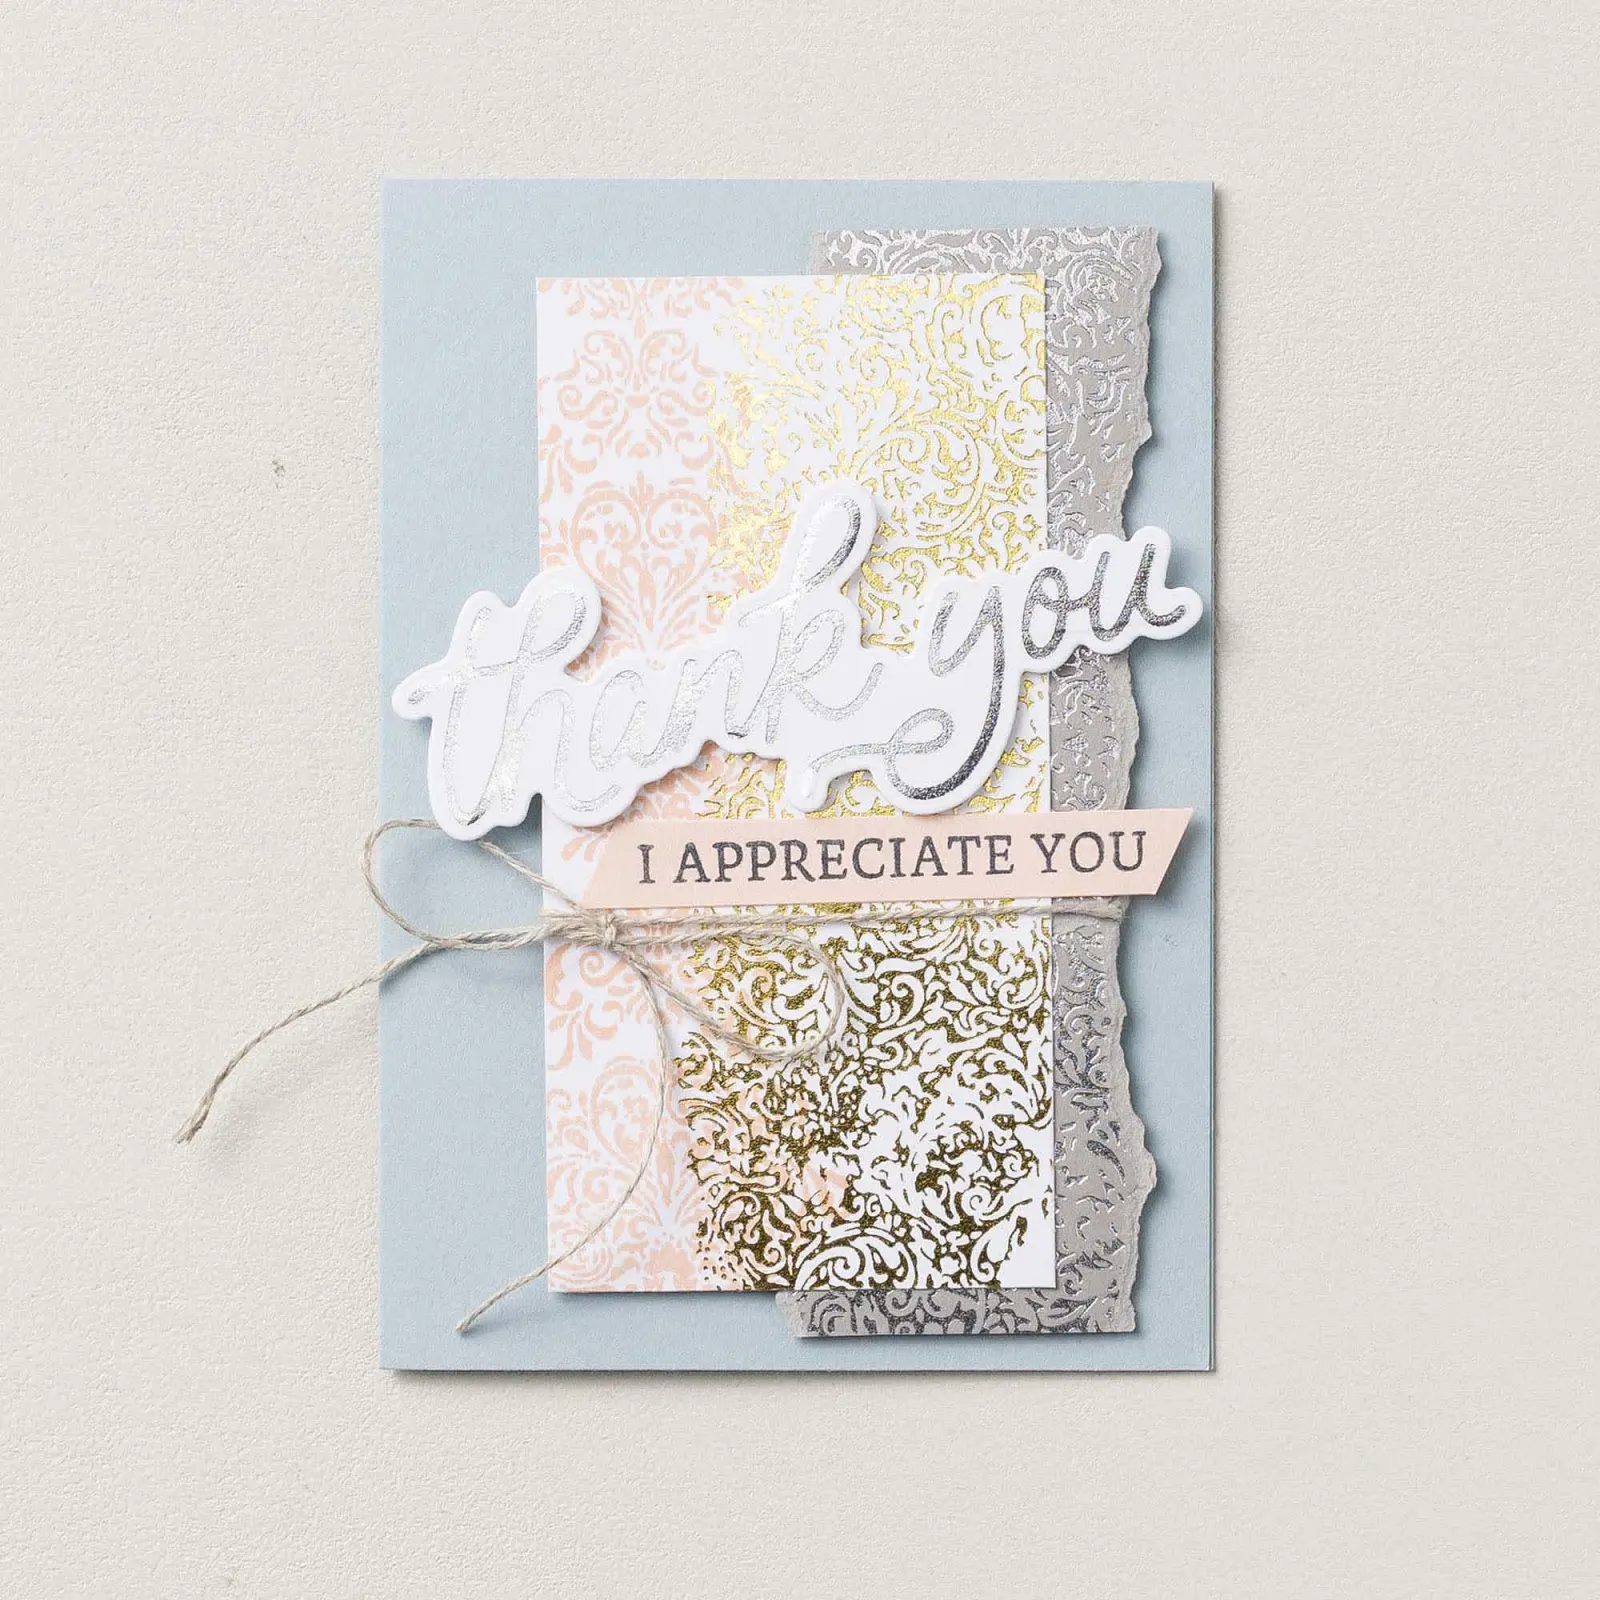
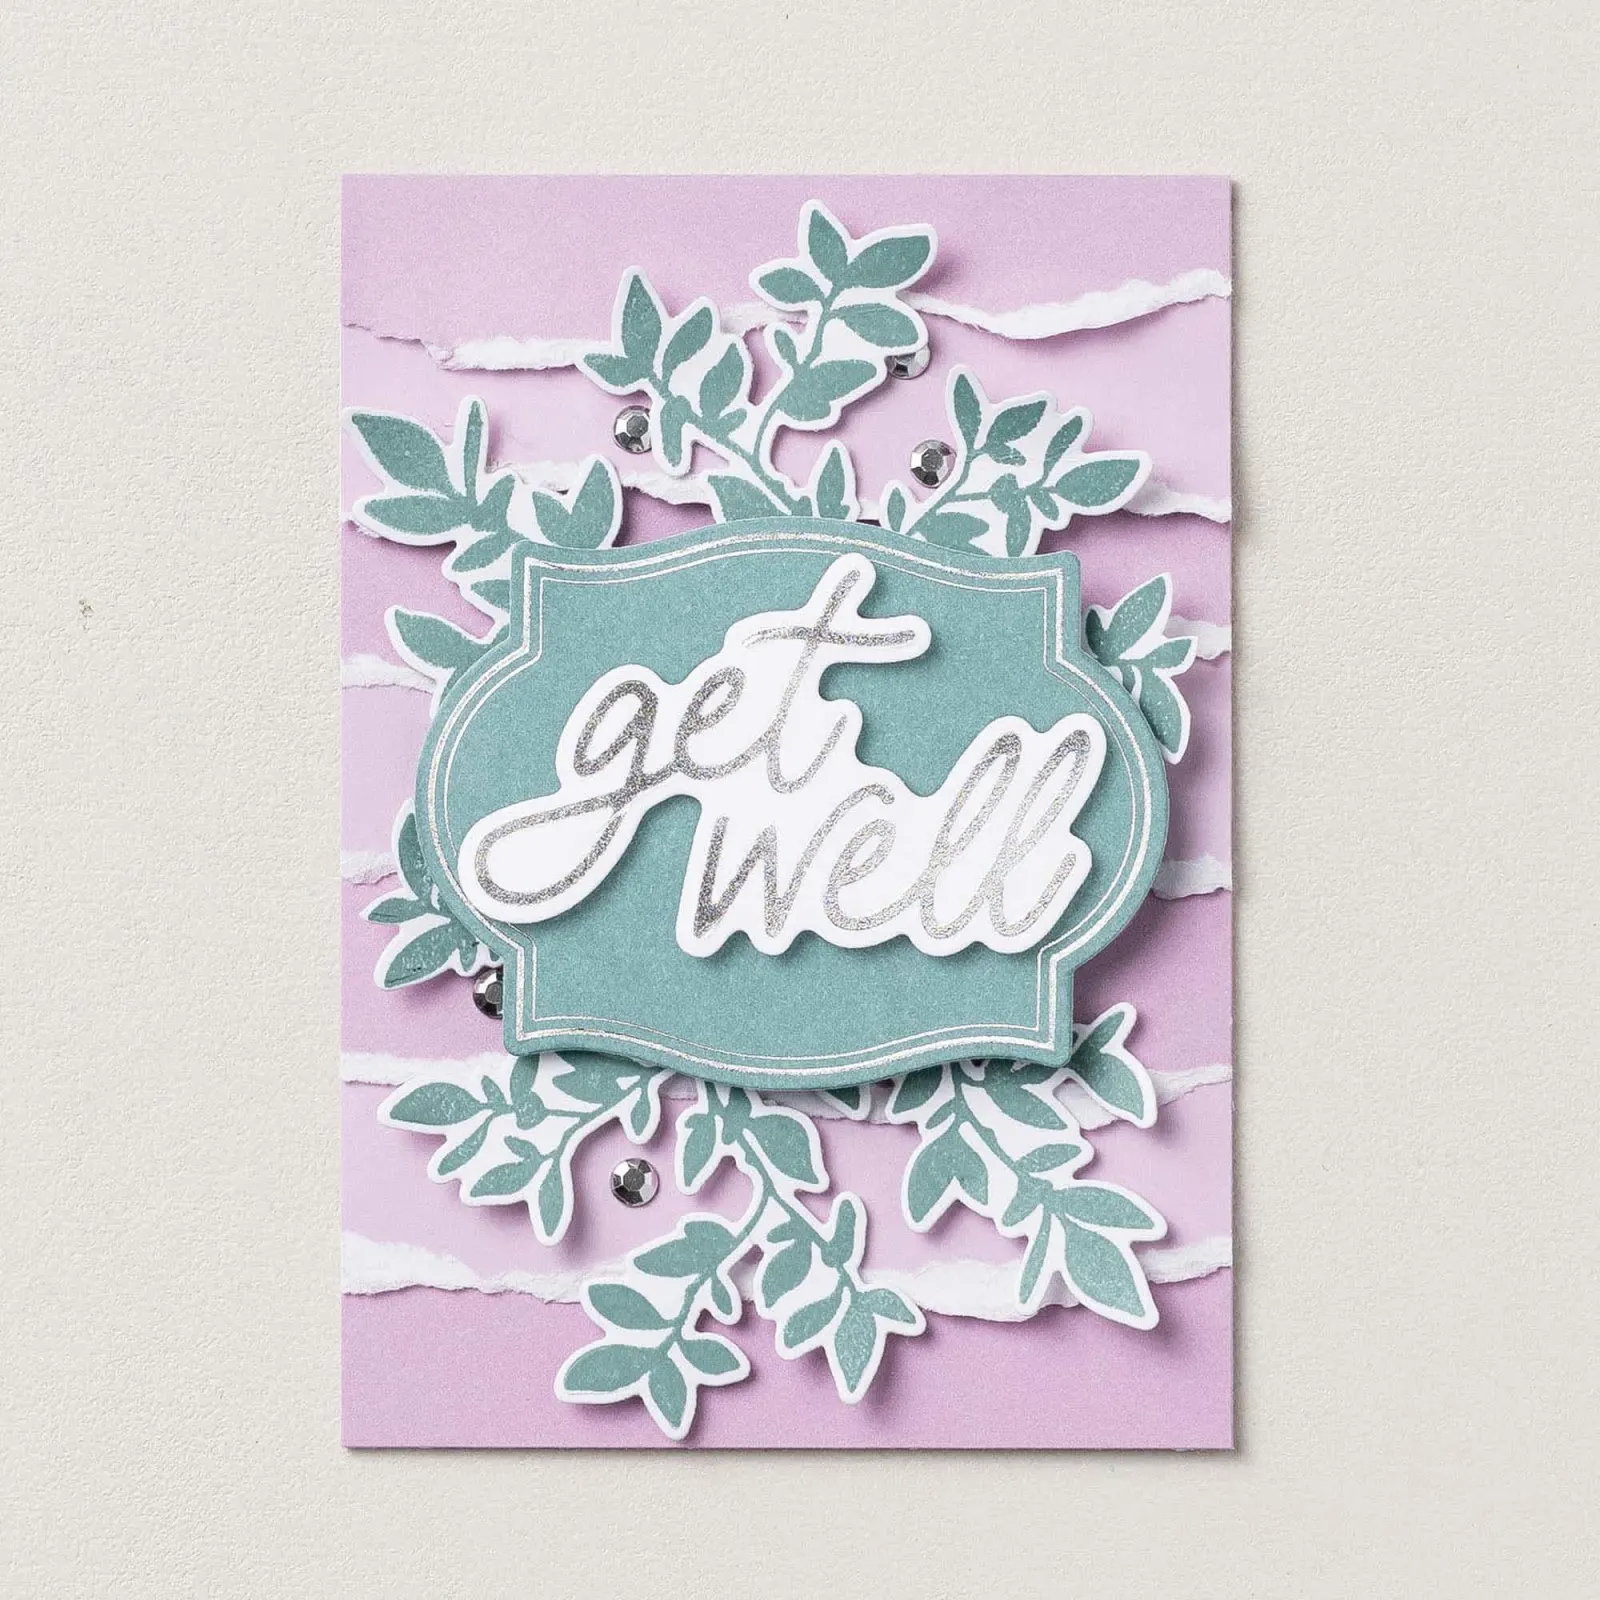
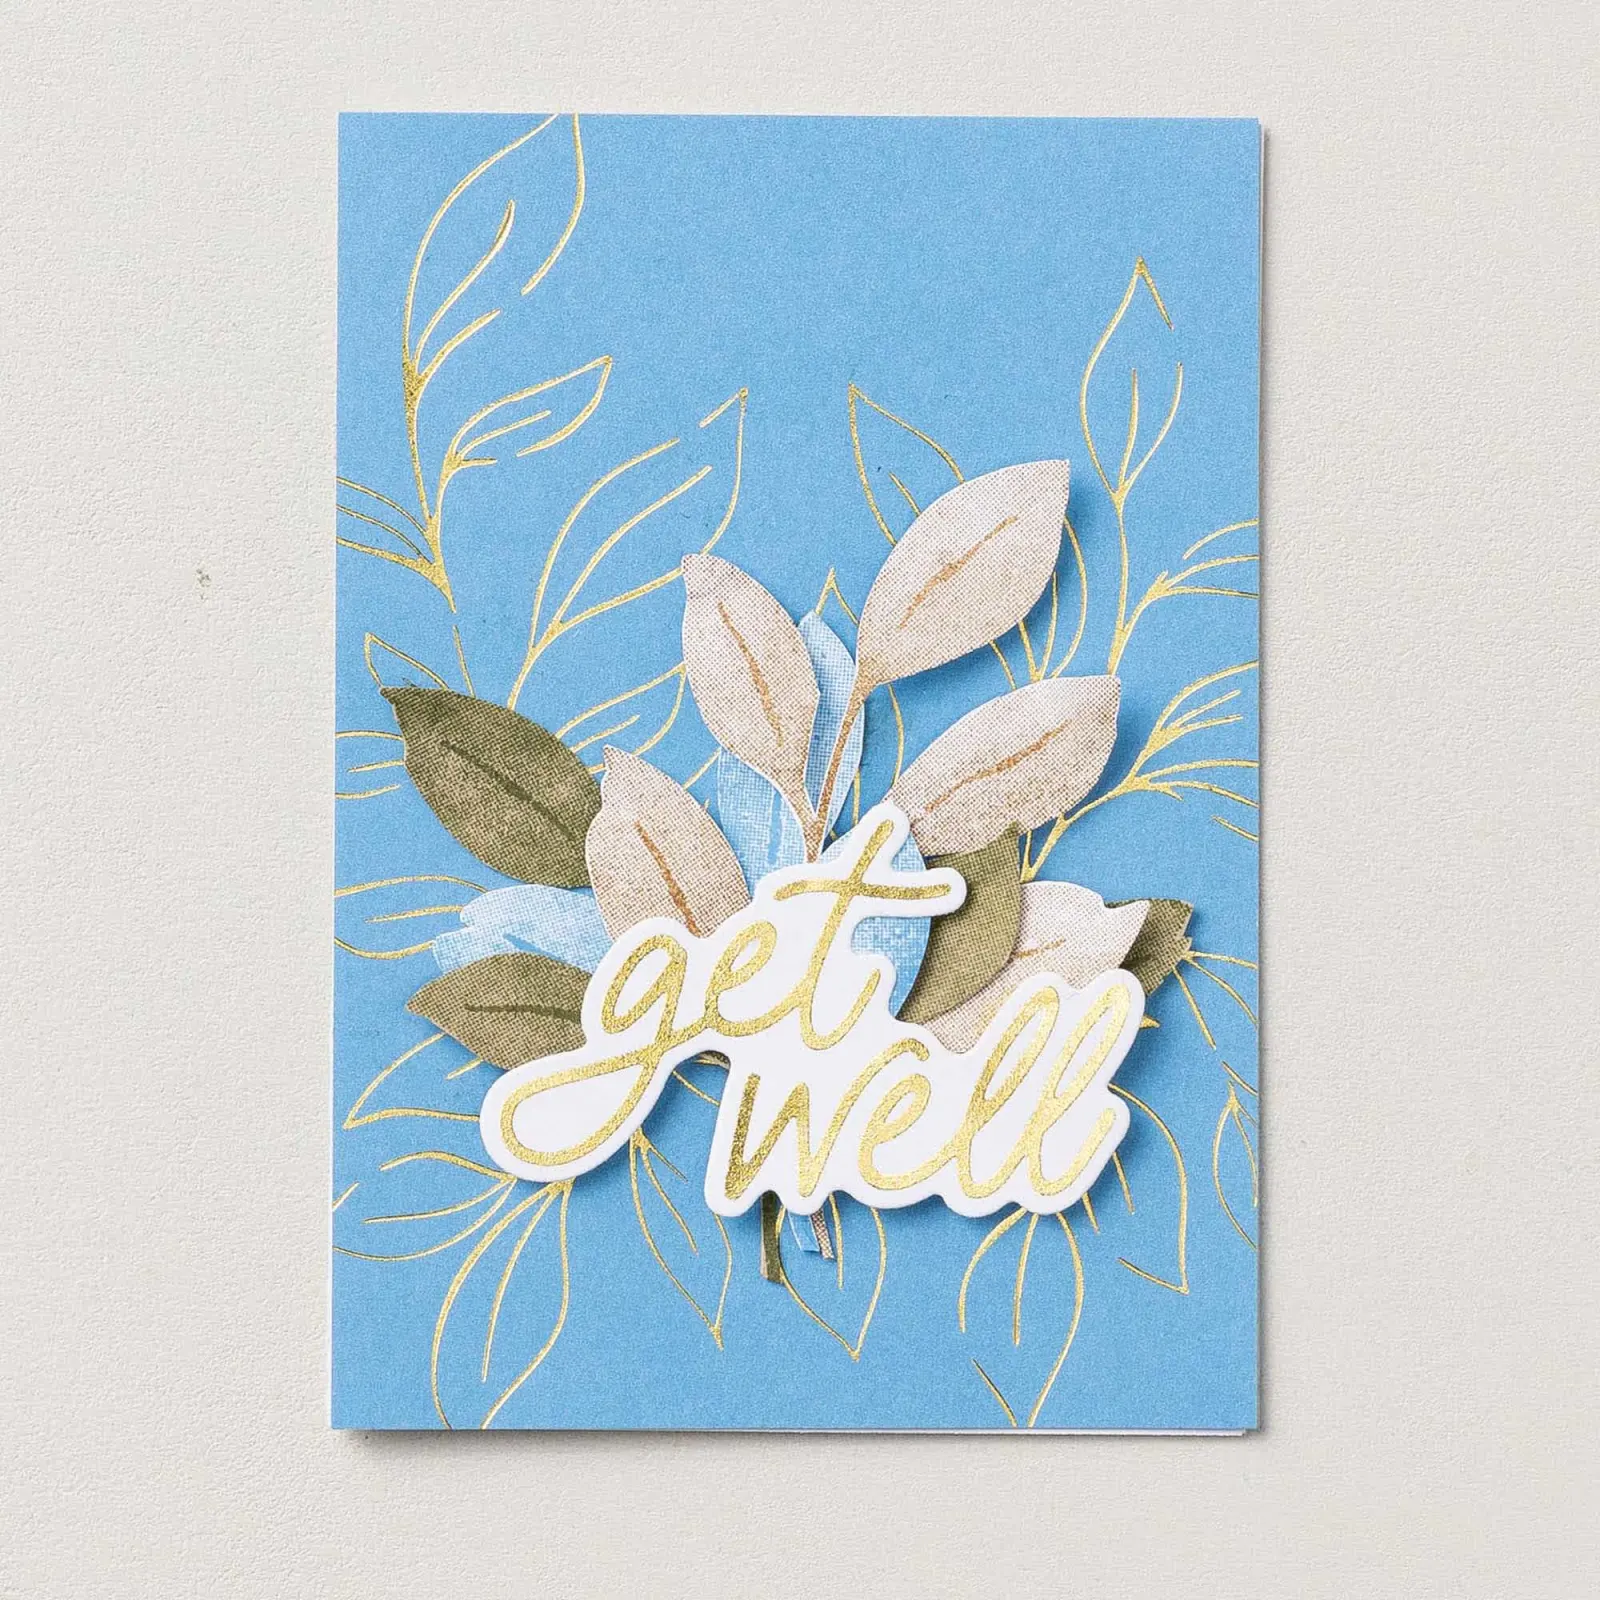
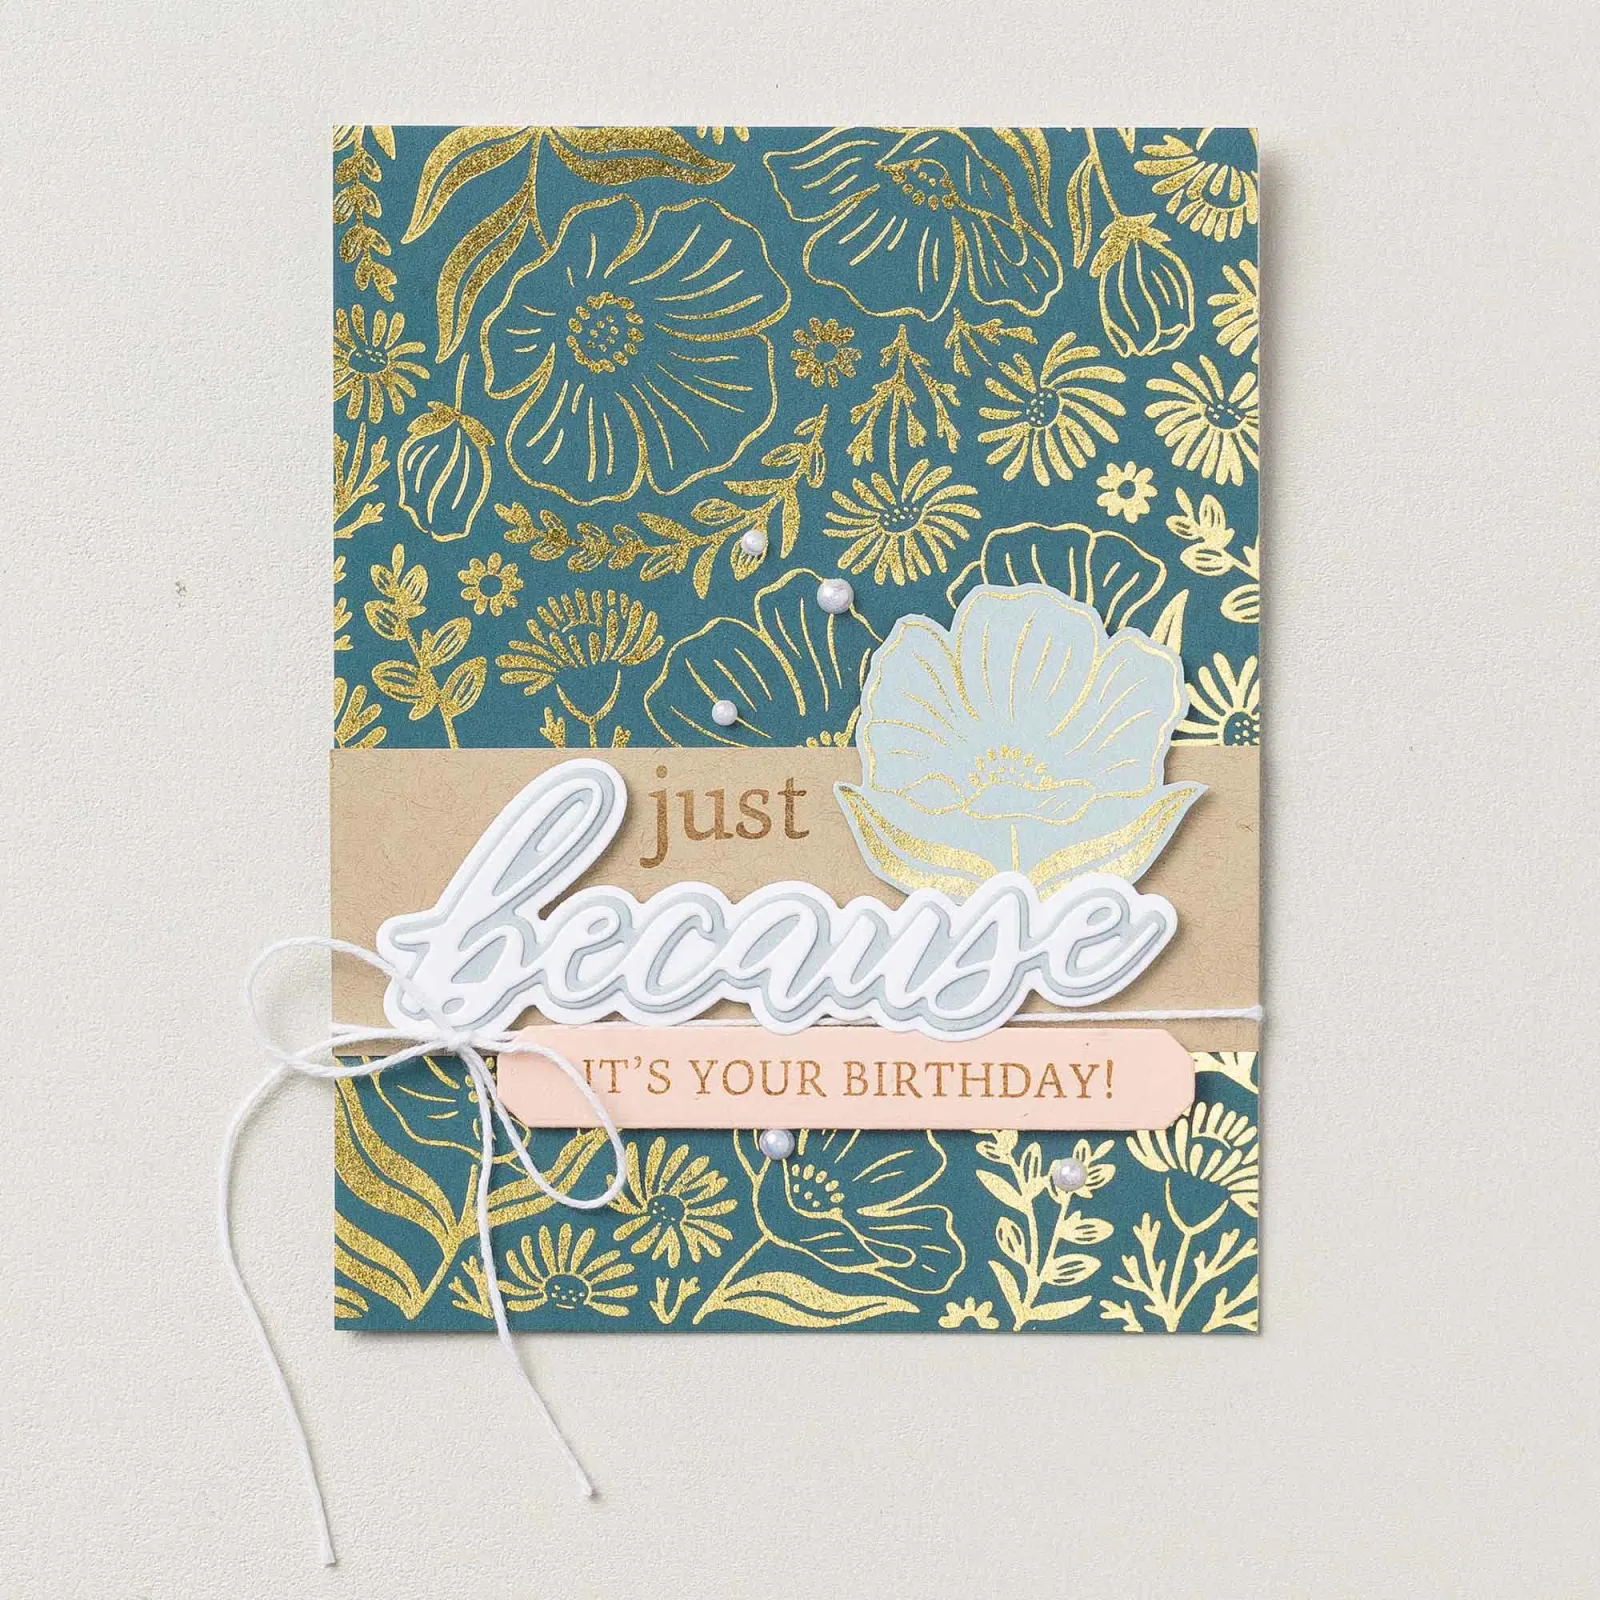
If you're staring at your new system wondering what to actually make, here are some great starting points:
Foiled greeting cards — pair an embellished metallic accent with a simple stamped greeting
Foiled borders & frames — shiny borders around photo panels or journaling spots (gorgeous for scrapbook layouts)
Gift tags & envelopes — a little metallic flap detail makes a handmade envelope feel extra special
Foiled vellum overlays — foil a floral or geometric design onto vellum and layer it over colored cardstock for a soft, glowy look
Mixed-media art — combine a foiled image with watercolor, stenciling, or embossing paste for texture and shine
Troubleshooting: What to Do When Foiling Goes Sideways
Every hot foiler runs into hiccups at some point — it's genuinely part of the learning curve, not a sign you're doing it wrong. Here's your cheat sheet:
Foil didn't transfer completely / looks patchy
Make sure you're on smooth cardstock (Two-Tone Cardstock is a great choice)
Preheat your die for an extra 30–60 seconds
Check your foil for marks or blemishes before applying — those will transfer right along with everything else
A few stray flecks of foil are totally normal, especially on bigger designs — don't stress over it
Design shifted or looks "ghosted" (double image)
Only run the platform through once — going through twice (or back and forth) can cause shifting
Secure your foil and die with a bit of low-tack tape before rolling through (make sure the foil is shiny side down, or the tape will mess with the effect)
Hold the die steady when you remove it from the heat
Let everything cool fully before peeling
Go slow and steady through the machine
There's foil where it shouldn't be (over-foiling)
Wipe your cardstock with an antistatic pouch before foiling — static cling is often the culprit
Try reducing the number of shims, or switch to slightly thinner paper
Lightly erase any stray foiled spots with a clean white eraser
There's a foil "halo" or outline around your design
Trim your foil closer to the actual design before placing it
Reduce pressure by removing a shim
Be extra careful moving your sandwich to the machine if you assembled it while the die was already heating — that's often when shifting happens
Foil looks dull or cloudy instead of shiny
Clean your die with a soft cloth
Store your foil away from dust when it's not in use
Foil keeps sticking to the die itself
Double check the foil is shiny side down on the die before heating
Never scrape metal tools across your dies — it scratches the surface and will mess with future transfers
Caring for Your Foil and Dies
Store foil in a box or other protective packaging. Creases in the foil roll can transfer right onto your image, so keeping it protected really does matter.
Clean your dies with a soft cloth once they've cooled. Skip anything abrasive — you want to avoid scratching the etched surface.
Test new materials in small batches. Every cardstock and foil combo behaves a little differently, so a quick test swatch saves you from wasting a full project.
Should You Get One Right Now?
Real talk: a hot foil system is a genuinely fun tool, but it's also a real investment — in cost, in counter space, and in the small learning curve it takes to get consistently gorgeous results.
If you're brand new to card making, there's no shame in waiting. Spend some time getting comfortable with the fundamentals first — stamping, adhesives, layering, basic die cutting — before adding a specialty tool like this to the mix. Foiling has its own quirks (the right cardstock, correct heat time, sandwich order, pressure), and it's just plain more fun to troubleshoot once you're not also learning how to line up a card base. The foil isn't going anywhere — it'll be just as shiny whenever you're ready for it.
If you already have a Cut & Emboss Machine, you're halfway there — the hot foil platform is designed to work with it, so you're really just adding the platform, dies, and foil.
If you love that "ooh, fancy" factor on wedding stationery, special-occasion cards, or gifts, this is a genuinely satisfying way to level up your handmade pieces.
Budget for the whole ecosystem, not just the machine. Hot foil dies and foil rolls are ongoing costs, similar to how stamps and dies work in regular card making — so factor that into your decision.
Frequently Asked Questions
What tools do I need for hot foiling?
The Stampin' Hot Foil System, specially-made hot foil dies, Stampin' Hot Foil Rolls, and a Stampin' Cut & Emboss Machine.
Can I use my regular cutting dies for hot foiling?
No — cutting dies and hot foil dies are built differently (different coating, thickness, and etching), and using the wrong one can damage both the die and the system.
What kind of foil should I use?
Stick with foil made specifically for the system you're using — it's formulated to transfer properly at the right heat and pressure.
How should I store my foil?
Keep it in a box or protective packaging so it doesn't crease — creases can transfer onto your foiled image.
What materials can be hot foiled?
Smooth cardstock, vellum, Designer Series Paper, window sheets, and pearlized specialty paper all work well. Always test small samples first, especially with anything textured or porous.
How do I avoid patchy or "over-foiled" results?
Patchy foiling usually means not enough heat or a textured surface — try preheating longer or switching to smoother paper. Over-foiling (extra foil outside your design) can often be gently removed with a clean sand or white eraser.
Final Thoughts
Hot foiling really does feel like a little bit of magic the first time you peel back that foil and see a crisp, shiny design underneath. Give yourself some grace while you're learning — keep scrap cardstock on hand for test runs, don't rush the process, and you'll be turning out genuinely gorgeous, professional-looking pieces in no time.