


Shadowed Mosaic Grid Card with the Thanks & Giving Stamp Set

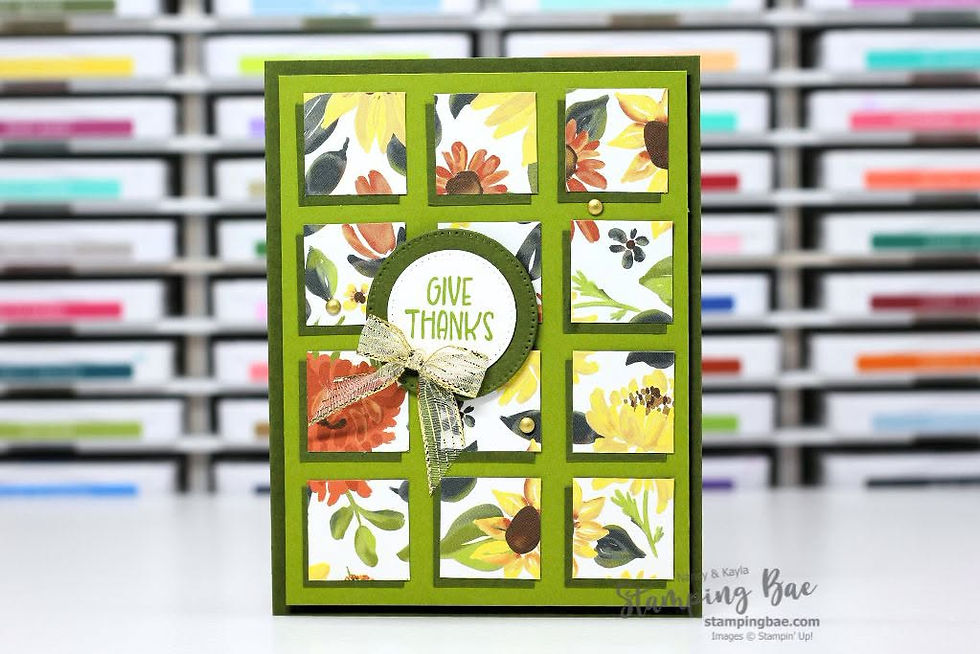
Twelve little squares, one sheet of Sunflower Fields Designer Series Paper, and a trick that makes every square look like it's casting a shadow. We cut matching squares from Mossy Meadow Cardstock and the paper, then set each paper square slightly up and to the right so a sliver of green peeks out underneath. Lined up in a three-by-four grid on Old Olive, the pattern still reads as one piece, just with a lot more dimension.
Watch how it's made on our livestream
Ready to give it a try? Here's how to get everything you need — including free, if you're already planning to shop with us this week!

1. Get the Kit FREE (Best Value)
Pre-cut + tutorials for all 4 card designs* **
Free with $50+ order
Order by Oct 10, 2026, ships ~Oct 12

2. Card Tutorial Only (No Supplies)
Just the tutorial & measurements for all cards
$10
Available anytime
* Limit 1 Card Kit per customer.
**We might not be able to provide the exact designer series paper pattern but will provide you with another pattern from the same designer series paper pack.
Project Details & Inspiration

Start with a Mossy Meadow Cardstock card base then cut a piece of Mossy Meadow and a matching piece of Sunflower Fields Designer Series Paper into twelve squares: two cuts along the short side, then three along the long side. Tip: Lay the paper squares out in order as you cut so the pattern stays in place. Each paper square goes on a Mossy Meadow square shifted slightly up and to the right, keeping the offset the same every time, and all twelve are arranged in three columns and four rows on an Old Olive panel.
The Old Olive panel is popped onto the card front with Stampin’ Dimensionals, and a Basic White panel goes inside. The sentiment was stamped in Old Olive ink on Basic White Cardstock, die cut with a circle from the Stylish Shapes Dies, and layered on a slightly larger Mossy Meadow circle. It sits on Dimensionals just above the center of the grid, with a Gold Striped Mesh Ribbon bow at its lower left and three Gold Adhesive-Backed Dots around the front.
Supplies Used on This Project
We used a mix of classic Stampin’ Up! favorites and a few fun new releases to bring this project to life. From richly colored inks to perfectly coordinated paper and embellishments, every product helps you create professional-looking results with ease.
Every week we send a brand-new card kit FREE with $50+ orders!
Let’s Stay Connected

If you give this project a try, we’d love to see your version! Share your photos in our Exclusive Stamping BAE Facebook Group or tag us on Instagram @StampingBAE love seeing your creativity in action.
Want weekly crafty inspiration and ways to keep your craft space organized? Join our newsletter for fun tutorials, insider perks, and a sprinkle of laughs & crafts every week.


