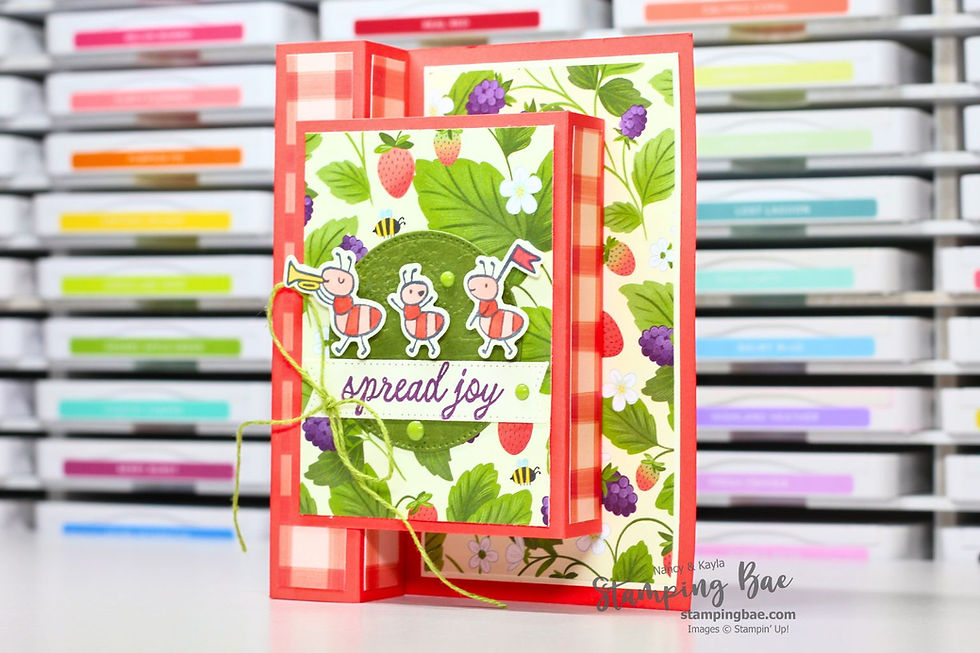
Double the Z, Double the Fun: Z Fold Card Featuring Painterly Pears
- Nancy & Kayla

- Jul 17, 2025
- 2 min read
Let’s Be Honest, Flat Cards Are Boring
There’s just something about a flat card that makes us go, “meh.” You know what we mean? We’re always itching to throw in a fun fold and this week’s card didn’t disappoint!
Despite a few technical hiccups (yes, our camera had its own opinion about cooperating), we still pulled off a gorgeous double Z fold card using the brand new Painterly Pears Designer Series Paper and the delicious Timid Tiger cardstock.
If you joined us live on YouTube, bless you for riding through the chaos. And if you missed it girl, go watch the replay. We promise you'll laugh, you'll learn, and you might even catch a glimpse of our favorite Bob Ross socks (shout out to Jill for that amazing happy mail!).
And yes, we do have a big announcement at the end of the video that might involve, you guessed it mystery boxes (eeeek!).

For this card, we used Timid Tiger for the card base. Then we adhered layers of the new Painterly Pears Designer Series Paper and Basic Beige Cardstock. The sentiment from the coordinating stamp set was stamped in Early Espresso ink then die cut out using the coordinating dies. We then adhered this to front of the stamped pear images which is layered on top of the Perennial Postage die cut.
Be sure to watch the YouTube video for full directions.
Measurements:
We know you’re going to want to try this, so here’s how we cut everything down:
Timid Tiger Cardstock
4-1/4" x 11"; score on the long side at 2-3/4" and cut at 5-1/2"
2-3/4" x 10"; score on the long side at 4-3/4" and 7-1/2"
Basic Beige Cardstock
2-1/2"x 2-1/2"
2-1/4"x 2-1/2"
Scrap for die cut
Basic White Cardstock
Scrap for stamping image/sentiment and die cut
Floral Charm Designer Series Paper
4"x 5-1/4"
4"x 2-1/2"
2-1/2"x 4-1/2"
Timid Tiger Cardstock
Scrap for die cut
Miss the Live? Catch the Replay!
We shared:
A detailed step-by-step of the Z fold assembly (with a side of laughter)
Tips for using Wink of Stella as a coloring tool
A genius way to keep your dies in place using Post-it Notes
A behind-the-scenes look at Nancy’s bow-tying skills or struggle
A BIG announcement about our upcoming Mystery Box Sale
Watch the replay and craft along with us, or just join for the fun. And if you want the first dibs on mystery boxes and future class launches, make sure you’re on our email list. You'll get 5 free tutorials just for joining.
P.S. Are you crafting along with us?
If you’re in our Facebook group, don’t forget we’ve got a Christmas in July challenge going on! One card a day—your future self in December will thank you. Even if you’re behind, jump in and get caught up. We’re cheering you on the whole way.
Until next time, stay crafty and don’t forget: if your bow’s a hot mess, just call it “whimsical.”
Happy crafting, and let us know if you give this one a try!


